Create an Azure Integration
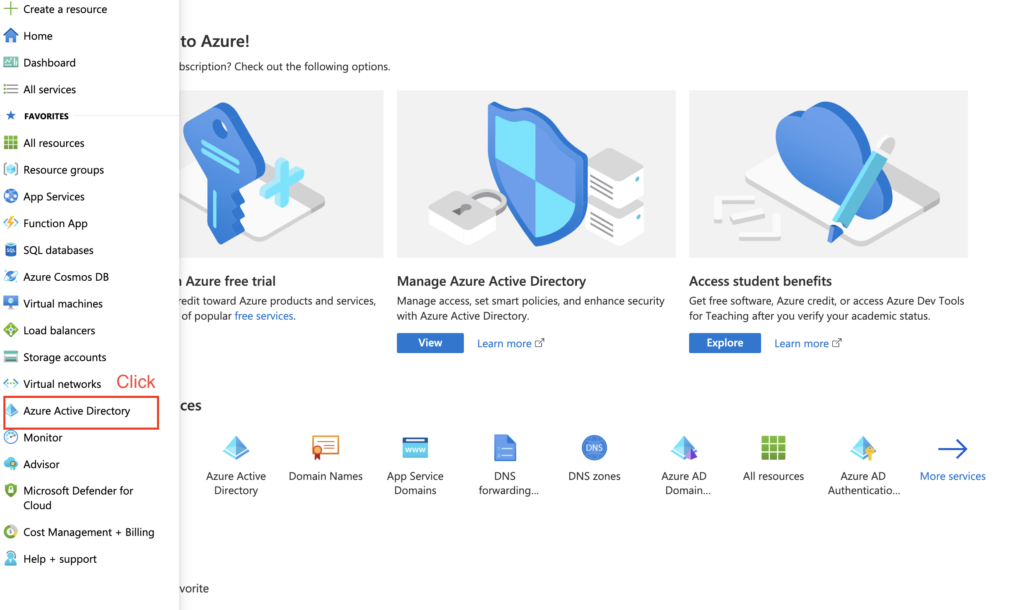
Step 1
Navigate to the Azure portal and go to Azure Active Directory.
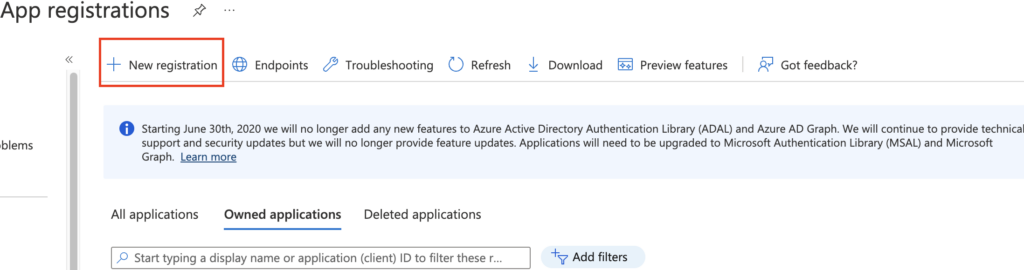
Step 2
In Azure Active Directory, go to App registrations.
Step 3
Click on “New registration.”
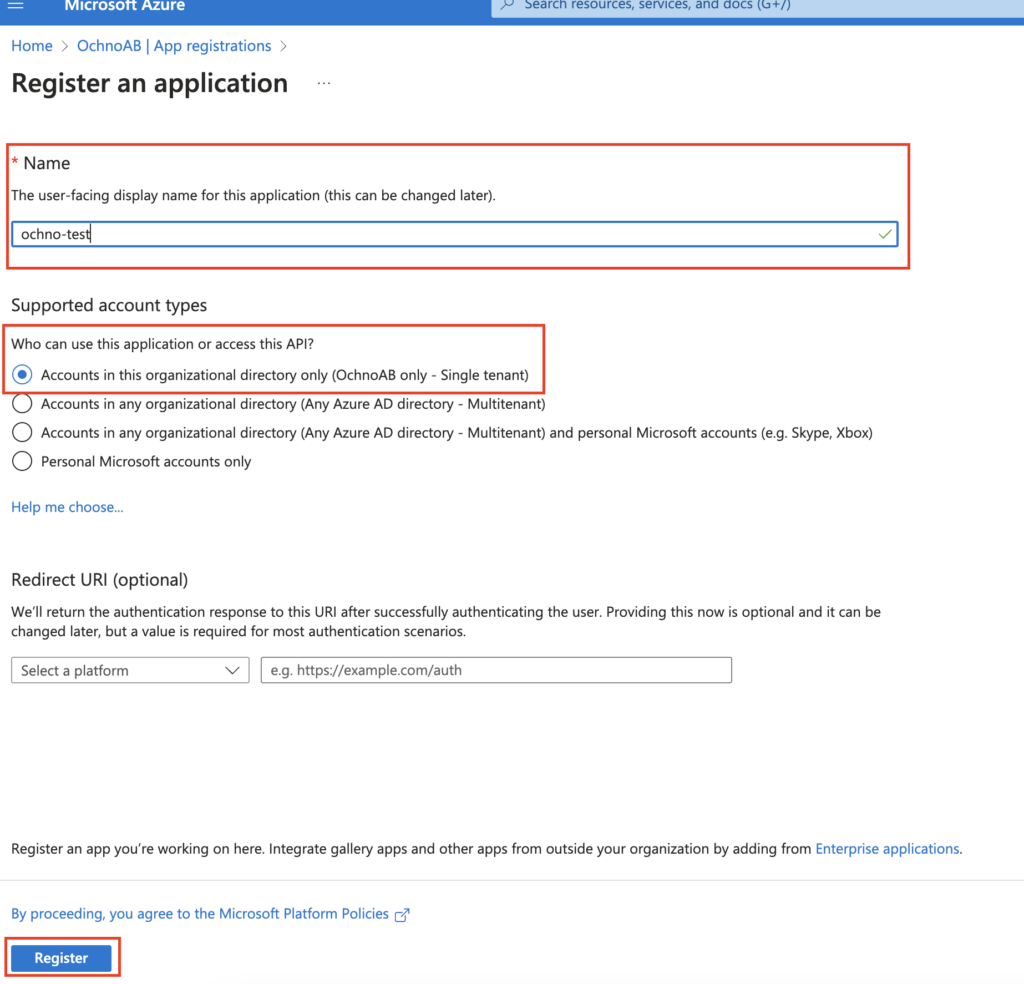
Step 4
Fill in the name -> check “Single tenant” -> Register.
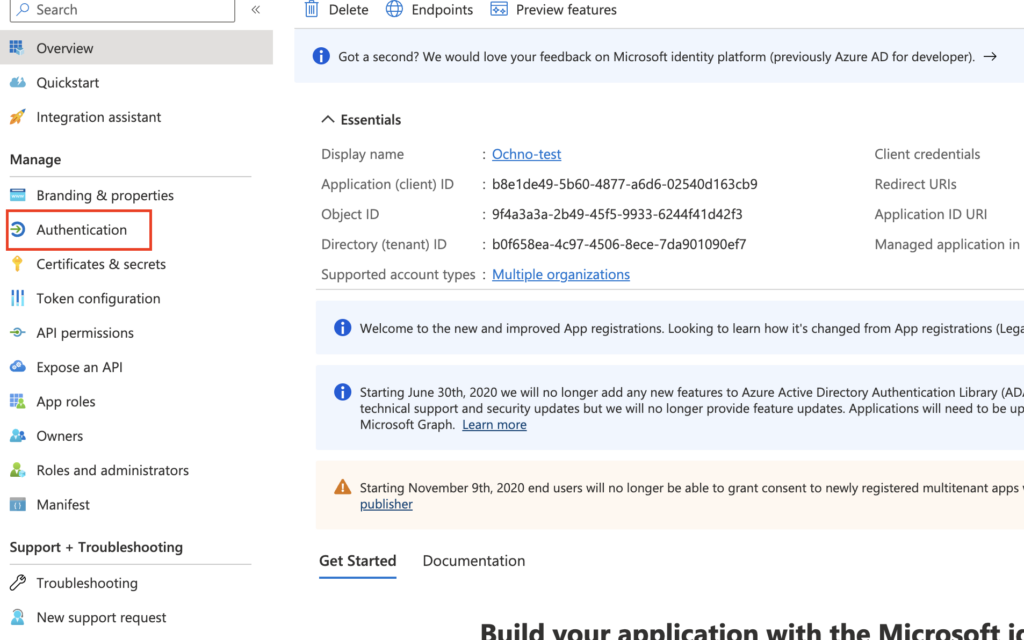
Step 5
On the App page, navigate to “Authentication.”
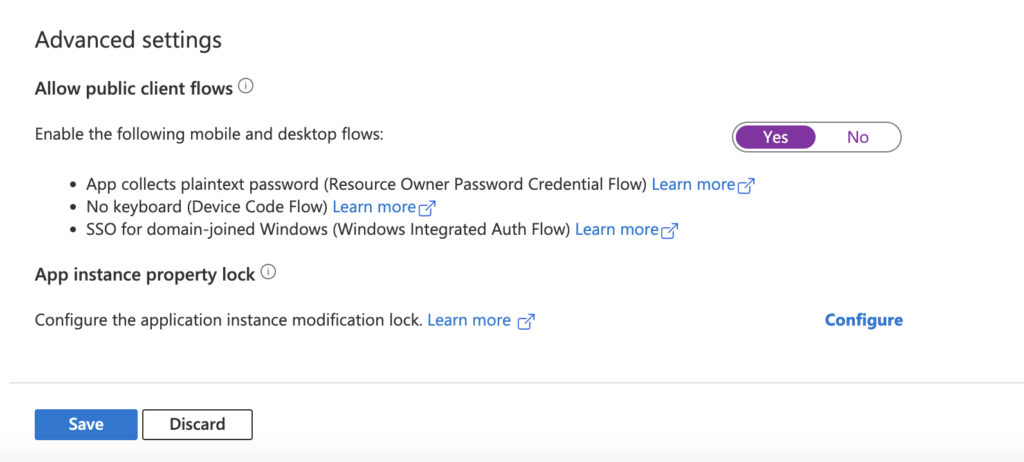
Step 6
Scroll down to Advanced settings.
Set “Allow public client flows” to “yes,” then click “save” (the application uses Device Code Flow).
Step 7
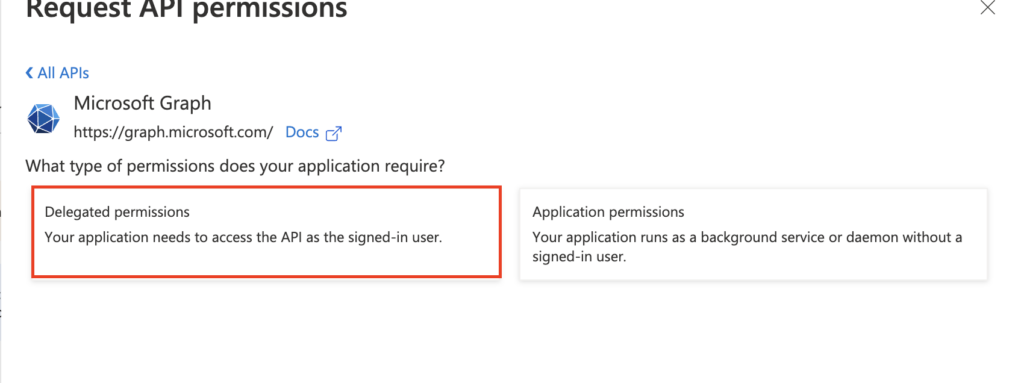
Navigate to “API permissions” and click “Add a permission.”
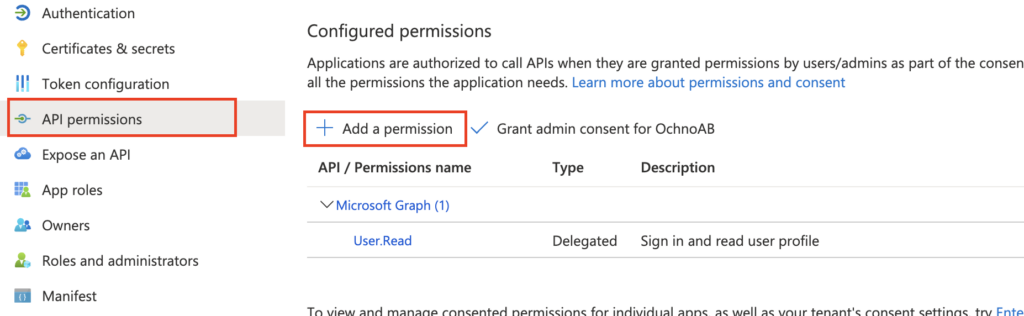
Step 8
Click “Microsoft Graph.”

Step 9
Choose “Delegated permissions.”